Autrice : Nikki Henderson
Les ventes de multicoques dits de « performance » ne cessent de croître et il devient de plus en plus important d’apprendre à les manier correctement notamment en ce qui concerne les techniques spécifiques au multicoque. Le marché de ces bateaux s’élargit ; les propriétaires de multicoques cherchent à monter en gamme, les marins en monocoques cherchent plus grand et même les novices n’ayant aucune expérience de la voile sont de plus en plus tentés.
Au cours des 12 derniers mois, pendant mes formations Outremer, j’ai rencontré des centaines de ces propriétaires, allant de jeunes familles à des couples de retraités, emménageant à bord d’un nouveau catamaran et partant en tour du monde. Naviguer un catamaran de performance est réalisable même pour un novice du multicoque mais il y a une grande différence entre simplement « se débrouiller » sur un tel bateau et naviguer efficacement, en toute sécurité et avec style.
La transition, même pour les marins expérimentés, peut-être une grande étape à franchir. Pour un habitué du monocoque, les différences sont flagrantes : augmentation du volume et de la vitesse, et absence de gîte. Et même pour un marin habitué du multicoque, la maniabilité et les performances sont nettement moins indulgentes et nécessitent adaptation : de sa concentration et de sa technique.
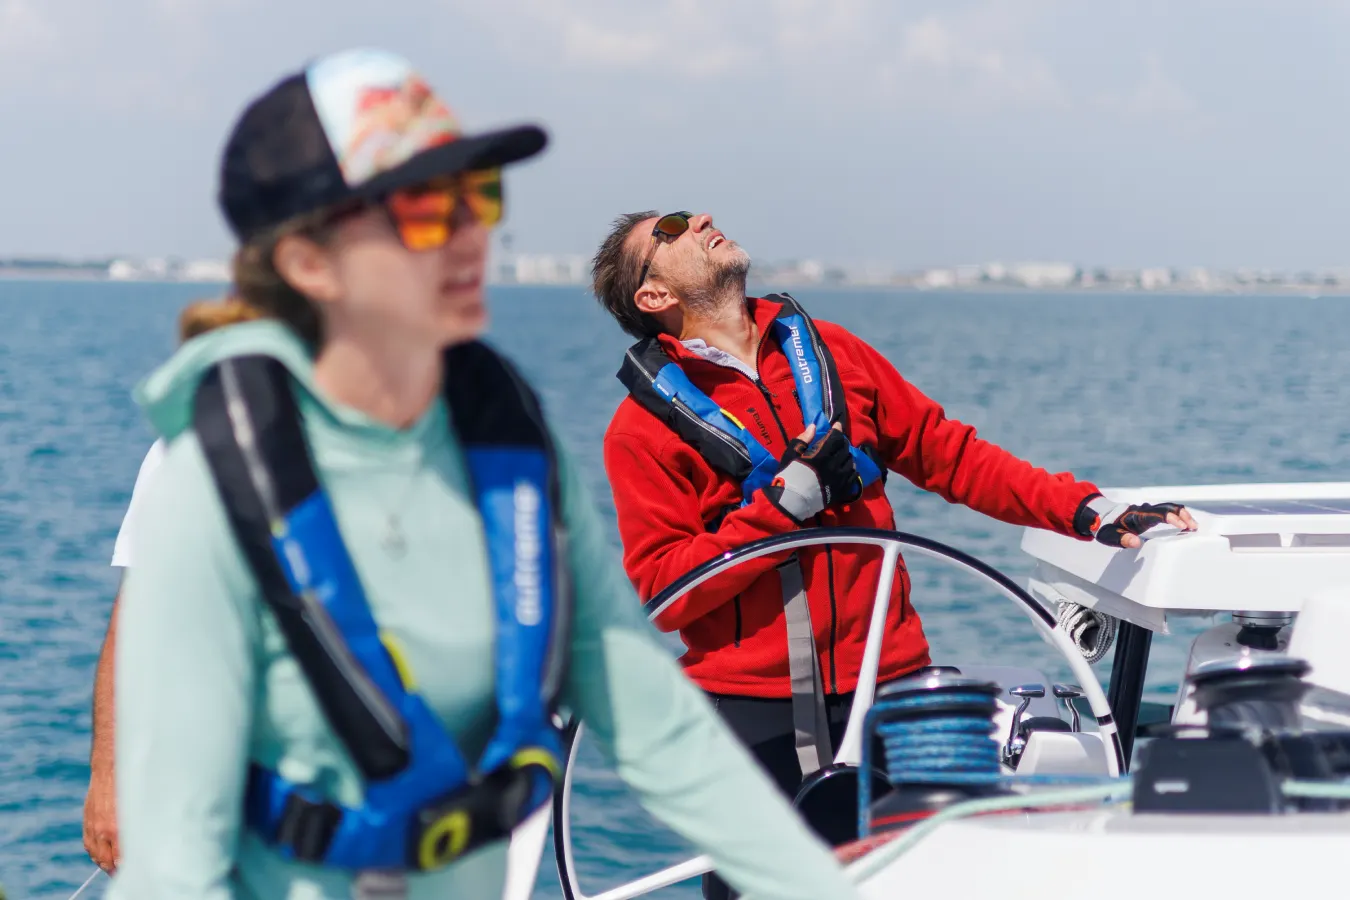
Cet hiver, j’ai embarqué pour un transatlantique avec les nouveaux propriétaires d’un Outremer 55. Ils ont déjà été propriétaires d’un catamaran moins performant mais m’ont invité à bord pour les coacher : les aider au routage et les aider globalement à tirer le meilleur parti de toutes les performances offertes par ce nouveau bateau. Voici quelques-uns des sujets sur lesquels nous nous sommes concentrés :

Vitesse
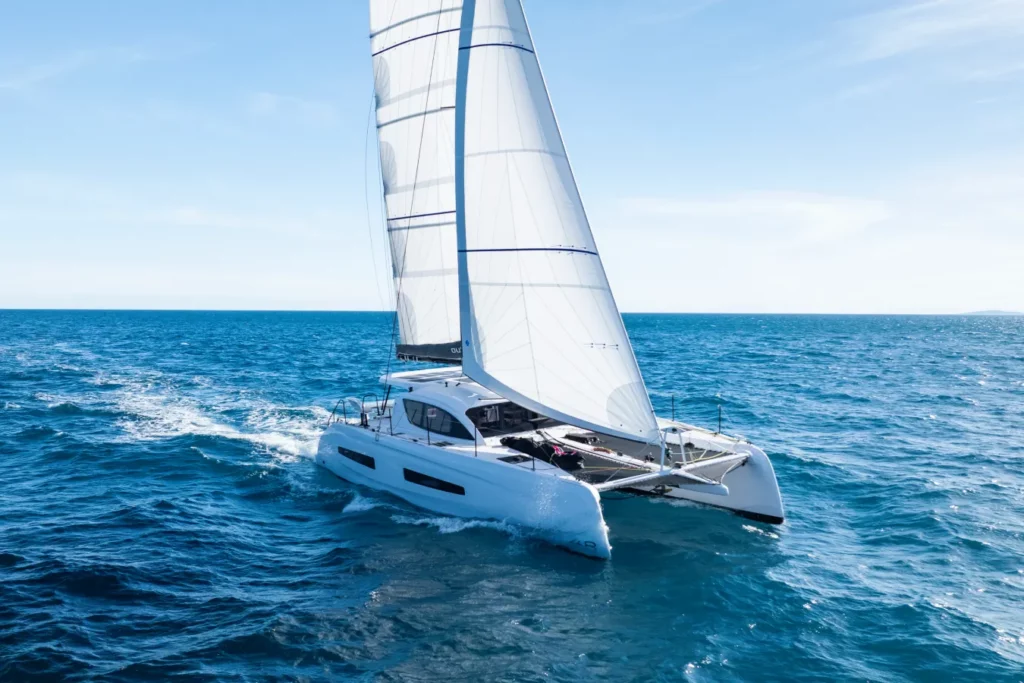
La plupart des monocoques aux carènes non-planantes feront à peu près la même vitesse à toutes les allures. Cependant, au largue, un multicoque performant peut naviguer à deux, trois, voire quatre fois sa vitesse au près.
Par exemple, les polaires du chantier d’un Outremer 55 donnent sa vitesse moyenne dans 20 nœuds de vent avec un angle de vent réel (TWA) de 50° à 8,5 nœuds, mais à la même vitesse de vent avec un TWA de 110° c’est 19,1 nœuds. C’est plus de deux fois plus rapide. Comment tirer le meilleur parti de cet avantage de vitesse ? Et comment le gérer au mieux ?
Sur un monocoque, il est souvent avantageux de prendre son temps et de parfois attendre plusieurs jours de plus en naviguant sur la meilleure route au vent, car cela donne normalement la meilleure vitesse corrigée (VMG). Une loxodromie au vent arrière est la stratégie habituelle pour les traversées océaniques plus longs, plutôt que de parcourir plus de milles et des angles plus larges. Cependant, sur un multicoque performant, il est important de prioriser le bord de largue au moment de planifier sa route.
Dans des conditions au près sur une longue traversée, demandez-vous si un relèvement de 20° au moins se traduira par un meilleur VMG, même si cela semble contre-intuitif. Dans des vents légers portant à 70° ou 80° TWA ce peut être la différence entre un bateau totalement décroché et 5 nœuds de vitesse de bateau.
Des vitesses plus rapides ouvrent la possibilité de suivre les systèmes météorologiques lorsqu’ils se déplacent autour du globe. Par exemple, si vous traversez l’Atlantique Nord vers l’est, idéalement, vous quitterez les États-Unis par temps clair avec une prévision de dépression qui quittera la côte américaine quelques jours plus tard.
Vous pouvez utiliser la trajectoire prévisionnelle pour décider de la direction plutôt nord ou sud à ajouter à votre cap vers l’est, pour vous assurer qu’au fur et à mesure qu’il vous rattrape, vous êtes suffisamment au sud pour capter ses forts vents d’ouest.
À mesure qu’ils approchent, vous allez accélérer, et si vous pouvez maintenir la vitesse, vous pouvez utiliser ce flux d’air sous le vent pour vous pousser sur la majeure partie.

Maintenir une vitesse élevée
Le contrôle et la conduite du bateau à ces vitesses plus élevées nécessitent un changement de stratégie. Des vitesses et des accélérations accrues signifient que l’angle et la vitesse du vent apparent changent beaucoup plus fréquemment.
Vous avez donc besoin de solutions de réglage et de navigation adaptables et flexibles.
Au portant, le bateau doit tracer des courbes en S dans l’eau pour s’assurer qu’il atteint le meilleur VMG possible. Si vous y parvenez, vous atteindrez les vitesses moyennes à deux chiffres qu’offre un multicoque performant, tout en allant dans la bonne direction ! Au lieu de laisser la vitesse chuter à la fin de chaque surf, alors que la proue s’enfonce dans le fond de la vague, un multicoque performant peut simplement poursuivre son chemin.
1 Naviguez plus près du vent pour augmenter la vitesse du vent apparent (AWS) et la vitesse du bateau.
2 Immergez-vous au portant lorsque l’angle du vent apparent (AWA) augmente avec l’accélération.
3 Ramenez lentement le bateau au près à temps pour maintenir la vitesse moyenne et continuer à surfer.
Dans un monde idéal, pour y parvenir, le bateau serait barré à la main. Mais de manière réaliste, aucun plaisancier ne veut être sur le pont pendant deux semaines d’affilée lors d’une traversée transatlantique. Votre meilleur compromis est d’investir dans un pilote automatique de qualité, bien réglé, ainsi que de bons instruments à vent.
Réglez le pilote automatique pour naviguer à l’angle du vent apparent et observez comment le bateau slalom dans l’océan. La qualité du pilote commencera vraiment à montrer sa valeur lorsque la mer deviendra plus agitée. Les meilleurs s’améliorent avec le temps à mesure qu’ils collectent des données et apprennent les modèles de vagues. Si vous ne savez pas exactement quelle AWA est idéale, choisissez une journée avec un vent très constant et naviguez en eau libre. Réglez le pilote AWA à 90°, puis augmentez systématiquement le réglage par incréments de 5° à intervalles de temps fixes jusqu’à ce que vous descendiez le plus bas possible avant que la voile d’avant ne soit masquée derrière la grand-voile. Mesurez le VMG en comparant la distance parcourue à chacun des différents angles de vent et la route moyenne A à B sur le fond (COG) atteinte. Cela vous donnera un bon point de départ, puis il se déplacera davantage en fonction de l’état de la mer et de la force du vent.

Régler ses voiles
Une autre solution si vous souhaitez atteindre des vitesses élevées sans mettre en danger le bateau et son équipage est d’utiliser le vrillage (twist). Le twist est un compromis entre avoir une voile raide qui décroche quand le vent va à l’arrière, ou une voile très assouplie qui lofe quand elle va à l’avant. Plus les conditions sont changeantes, plus les augmentations d’accélération sont extrêmes, ou plus l’état de la mer est agité, plus vous avez besoin de twist.
La Grand-Voile
La grande largeur d’un multicoque permet d’avoir un long rail d’écoute, donc la plupart ne sont pas équipés de hale-bas. La tension de l’écoute et la position du chariot sont vos principales commandes pour donner du twist à la grand-voile. Commencez par trouver le réglage « full power » pour la grand-voile.
Réglez votre pilote pour un cap à 35-40°du vent apparent ; la plupart des multis performants devraient être capable de maintenir cette allure. Réglez le chariot au milieu du bateau et choquez l’écoute de grand-voile jusqu’au point ou la GV commencer à lofer. Bordez progressivement l’écoute jusqu’à ce que le penon supérieur se décroche Le winch manuel offre ici un meilleur contrôle qu’un winch électrique.
Hissez le chariot vers le vent jusqu’à ce que la bôme soit dans l’axe du catamaran. Le penon supérieur de la GV devrait maintenant « voler » environ trois quarts du temps. S’il est plus proche de 50 %, vous devrez peut-être border davantage l’écoute, puis lâcher un peu le chariot jusqu’au point où vous y parveniez (ou vice versa). Ceci est la forme de votre voile à pleine puissance, et votre position de chariot par défaut au près.
A ce stade, certaines personnes préfèrent marquer l’écoute de grand-voile (cela ne marcherait pas avec une écoute continue). Pour commencer, prenez simplement note de la position du chariot. Si les conditions exigent plus de vrillage, choquez l’écoute de grand-voile et tirez le chariot vers le vent pour garder la bôme dans la même position par rapport à l’axe du bateau. Vous pouvez noter trois positions du chariot pour chaque allure : pleine puissance, moyenne puissance, faible puissance.
Au fur et à mesure que le vent se déplace plus vers l’arrière, vous pouvez ajouter d’autres positions du chariot pour différents angles de vent en laissant descendre le chariot sous le vent tout en maintenant la forme de la grand-voile en mode « full power ». Une fois au largue, votre chariot sera complètement abaissé sous le vent. Mais avec ce réglage, gare au ragage au niveau des barres de flèche.
Foc
Une fois content du réglage de la grand-voile, vous pouvez régler le foc de la même manière, en utilisant la position du chariot et la tension de l’écoute. Réglez la tension de l’écoute de façon à ce que la forme de la chute ressemble beaucoup à celle de la grand-voile : plate avec une légère courbe en haut. Ensuite, réglez les chariots (si vous le pouvez) de façon à ce que la voile ne lofe pas, et que les penons supérieurs se lèvent également entre 50 et 75% du temps. Enfin, avancez jusqu’à l’étai et contrôlez le couloir entre les deux voiles. Ont-elles l’air à peu près parallèles ? Si ce n’est pas le cas, vous devrez peut-être élargir le couloir en descendant le chariot un peu plus sous le vent. Et là, c’est la position par défaut de votre chariot d’écoute de foc pour cette allure.
Lorsque les conditions se renforcent, n’oubliez pas d’ajouter du twist au foc. Au début, il suffit de choquer un peu l’écoute. Faites attention à ne pas hisser le chariot vers le vent, vous risquez de trop fermer le couloir. En choquant un peu l’écoute, vous ouvrirez la chute et vous aurez plus de twist.
Considérez le twist comme un compromis entre la navigation à pleine puissance et la prise d’un ris. Les multicoques nous parlent beaucoup moins que les monocoques. Vous n’avez pas les signes évidents que le bateau est surtoilé, comme un rail de fargue sous l’eau lorsque le bateau gîte.
Après un certain temps, vous apprendrez à connaître votre catamaran et à établir une connexion pour lire l’agressivité de l’accélération du bateau, le tangage, les bruits, et le rythme. Mais au début, il est utile d’avoir quelques guides de chiffres et des paramètres du vent pour savoir quand ajouter du twist et finalement quand prendre un ris.
En général, un catamaran de performance aura besoin d’un ris beaucoup plus tôt parce qu’il est plus léger. J’ai l’habitude de prendre un ris à 20-25 nœuds, deux ris à 25-30 nœuds et le troisième à 30-35 nœuds.

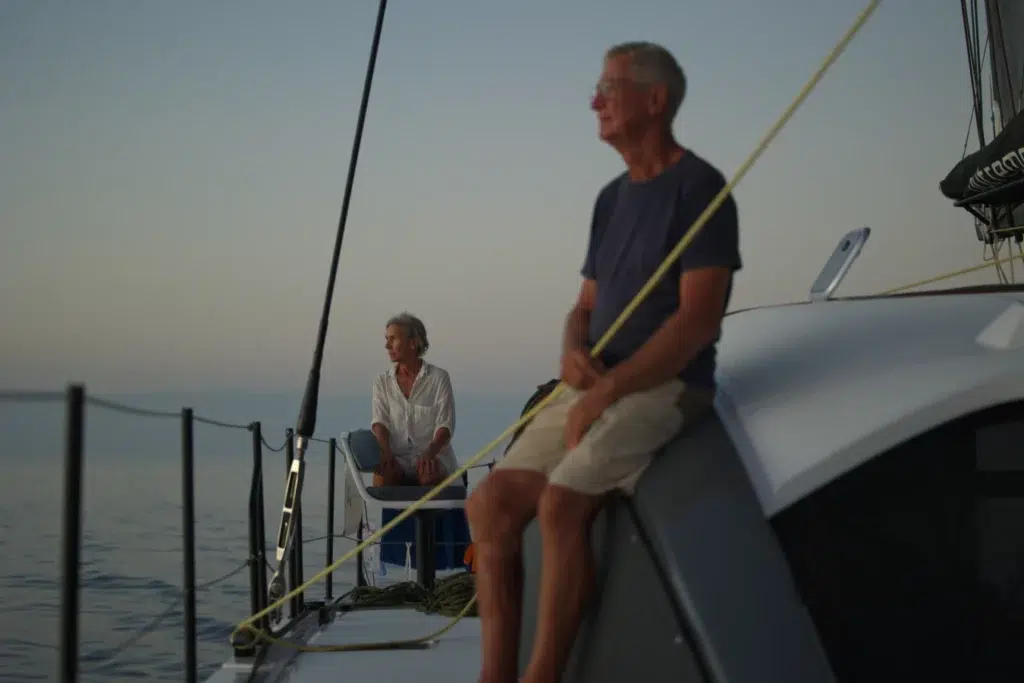
Confort
Lors de notre traversée transatlantique sur l’Outremer 55, contrairement à mes conseils sur les avantages de la navigation aux angles portant, nous avons choisi de naviguer vent arrière sous spi symétrique pendant toute la traversée.
Tirer pleinement parti de la vitesse d’un catamaran de performance a un coût. Une vitesse moyenne de 15 nœuds n’est pas l’idée que tout le monde se fait du confort. Les coques sont si rigides que chaque vague qui frappe la coque sonne comme le battement d’un tambour. Le ronronnement du gréement en carbone, le clapotis de l’eau qui passe sur le pont, le claquement des vagues, le vent : c’est incroyablement fort, même à 10 nœuds de moyenne, sans parler de 15 ou 20 nœuds.
De plus, les multicoques performants sont si légers qu’ils sont vraiment secoués en cas de mer formée. Notre décision de naviguer au portant plutôt que de chercher la vitesse et de profiter pleinement des performances s’explique par les raisons suivantes :
1. Absence d’un pilote automatique adéquat. Nous en avions un, mais il n’était pas capable de réagir assez rapidement à l’accélération et aux changement rapides de l’angle du vent au grand largue. Il a également eu du mal dans une mer formée, alors que la navigation avec des vagues alignées avec le bateau était plus facile à gérer.
2. Voiles. Nous n’avions pas de voile asymétrique lourde, ce qui est nécessaire pour naviguer avec ces angles de vent arrière (nos deux voiles reaching étaient légères).
3. Sécurité. Akaroa II est la coque n°2 d’un nouveau plan Outremer. Il s’agissait de la première traversée transatlantique que ce modèle de bateau avait effectuée, nous étions donc un terrain d’essai et par conséquent, délibérément prudents.
Malgré notre approche conservatrice, nous avons tout de même atteint des résultats vers 90 % par rapport aux polaires du chantier, avec une moyenne de 9,6 nœuds avec un vent soutenu de 20 nœuds sur l’ensemble de cette traversée de 2 700 milles.
Le voyage a duré 11 jours et 17 heures. La beauté d’un multicoque performant, c’est que même si vous ne le poussez pas, vous pouvez toujours atteindre des vitesses excellentes dans les bonnes conditions.
Nous avons calculé combien nous serions allés plus vite si nous avions navigué dans les angles au lieu de naviguer vent derrière. Cela suppose que nous aurions obtenu ces mêmes chiffres de 90% des polaires Un angle au vent réel de 140° semble être le point idéal.

Charges
Sans perdre de la puissance par voie de gîte, les multicoques de performance convertissent la puissance supplémentaire en accélération. Cette vitesse accrue s’accompagne d’une augmentation des charges sur le cordage, les poulies, les safrans, la toile et le gréement. Les winchs sont surdimensionnés. Des bloqueurs textiles sont utilisés à la place des bloqueurs standards. Les drisses sont des palans de 2:1. Vous naviguez peut-être sur un 50 pieds, mais les charges sont comparables à celles d’un monocoque de 70-80 pieds.
Un futur propriétaire me l’a récemment rappelé, lorsqu’il a ouvert le bloqueur du chariot GV tout en tenant la ligne avec un seul tour sur le winch. L’absence de peau sur sa main était une preuve effroyable de la surprise que peuvent représenter les charges lorsqu’un multicoque navigue à pleine puissance.
Il est intéressant de noter que si l’on compare un multicoque de croisière standard avec un multicoque de performance de taille similaire, c’est le contraire qui est vrai. Un bateau qui pèse moins lourd a besoin de moins de surface de voile pour le propulser. Par exemple, un Lagoon 450 a une surface de voile (au près) de 130 m², contre 104 m² pour un Outremer 45 (qui est en fait, 48 pieds de long). Ainsi, pour une même vitesse de vent apparent, la charge sur le matériel sera moins.
Faites attention lorsque vous naviguez au portant. En raison de la capacité d’un multicoque de performance à accélérer et à maintenir des vitesses élevées au vent arrière, il est facile de maintenir une surface de voile beaucoup plus grande dans des vitesses de vent réel plus élevées, car le vent apparent reste faible. Cependant, si vous heurtez le creux d’une vague et que vous vous arrêtez net dans l’eau, la voile, le gréement et tout le cordage ressentiront tous la force de ce vent.
Une autre raison de prendre un ris plus tôt que vous ne le pensez sur un multi performant est qu’avec des galhaubans reculés (nécessaires pour soutenir le mât en l’absence d’un pataras) et une grand-voile entièrement lattée, même si la drisse est relâchée au vent, la voile peut ne pas descendre. Vous devez naviguer avec le minimum de toile relevé pour arriver au niveau des polaires.
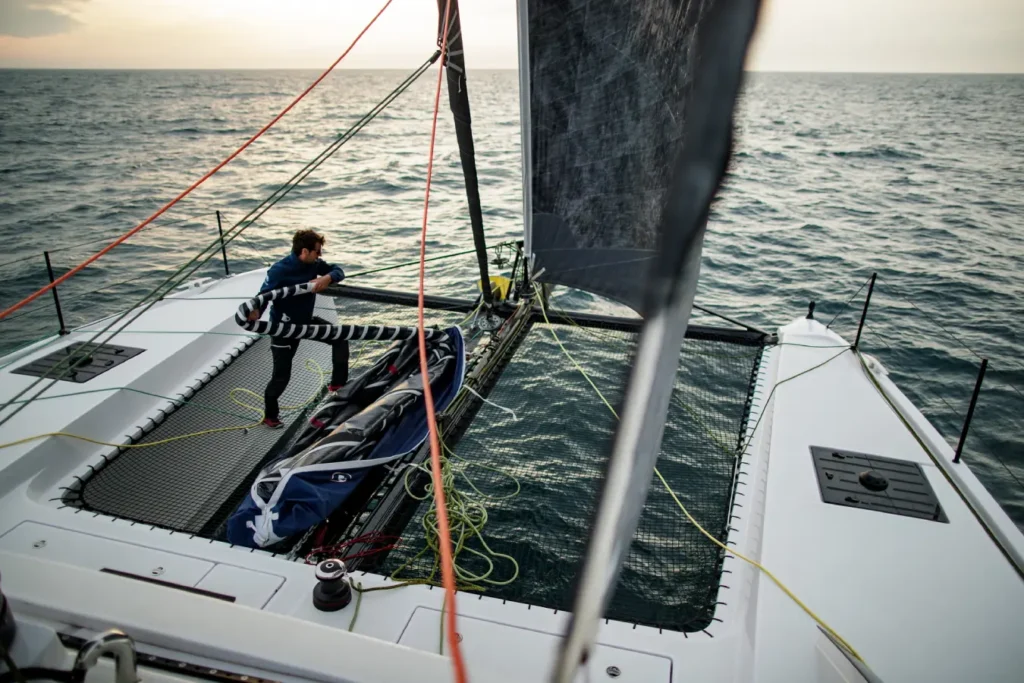
Prendre des ris
1. Frappez des bouts comme hale-bas sur chaque point de ris sur le guindant pour aider à faire descendre la voile. Gardez un œil pour du ragage du côté sous le vent sur chacun des goussets de lattes.
2. Utiliser le mât rotatif pour ouvrir davantage la voile au vent.
3. Si cela ne suffit pas, remonter au vent pour aider à affaler la voile.
Réglage d’un multicoque
Passer à un catamaran de performance peut apporter de nouvelles options de réglage : dérives, mât rotatif, et grand-voile à corne entièrement lattée.
Révisez les principes de base du réglage des voiles afin d’avoir des notions solides sur laquelle vous pourrez vous appuyer. Lorsque vous commencez à naviguer à bord, pour éviter d’être submergé (ce qui a tendance à amener les gens à sous-toiler leur bateau), commencez par trouver un réglage de base pour toutes les allures. Oubliez le gréement rotatif pour l’instant, mais trouvez un vrillage suffisant pour les voiles qui vous donne assez mais pas trop de puissance. Réglez les dérives comme vous le feriez sur un dériveur : vers le bas si au près, vers le haut si vent arrière, à mi-chemin vent de travers. Puis vous affinez le réglage.
Lorsque vous réglez les dérives, assurez-vous que votre trace GPS est activée. Vérifiez si le fait de descendre un peu plus de dérive aide avec la route fond. Au vent arrière, si vous avez l’impression d’être sur une patinoire, essayez de descendre un peu de dérive pour une meilleure adhérence. Si vous êtes sous pilote automatique, prenez note de l’angle du gouvernail. S’il fait passer la barre de plein tribord à plein bâbord, il se peut que vous ayez besoin de plus d’adhérence, sinon, prenez un ris.
Faites attention au risque de « trébucher » dans une mer formée. En cas de mer de plus de 3-4 m, il est plus sûr de lever les dérives et de laisser le bateau glisser sur les vagues plutôt que de risquer qu’une des dérives s’enfonce dans une vague et déstabilise le bateau. Bien que cela soit très improbable, si une dérive s’enfonce, le pire scénario serait un chavirage. Si vous voyez une zone plate sur l’eau qui suggère que le bateau glisse latéralement sur une vague, ou plus de gîte, ou une quantité importante d’eau sur le pont, ces sont des signes qu’il est temps de relever complètement les dérives.
Enfin, jouez avec le mât rotatif. Au niveau de base, essayez d’aligner le mât avec la position et la courbe de la voile d’avant. Le moyen le plus simple de s’en rendre compte est d’aller au pied du mât et de regarder le long de la voile. Il s’agit de la forme d’un foil qui, lorsqu’il est bien positionné, peut ajouter l’équivalent de 10% de surface de voile supplémentaire. De la même manière, vous pouvez l’utiliser pour réduire la puissance en diminuant l’angle.

Poids
Apprendre comment son catamaran de performance est sensible au poids peut être une véritable courbe d’apprentissage. Comparés aux catamarans de croisière, les catamarans de performance ont tendance à être deux fois moins lourds (ou même moins que ça). Par rapport à un monocoque, la principale différence se trouve dans les zones où le poids est le plus concentré. Le poids d’un monocoque est principalement concentré dans sa quille. La quasi-totalité du poids du bateau est concentrée sur environ 15 % de la longueur du bateau. Inversement, un multicoque n’a pas de quille, donc sans cet effet de balancier, son centre de gravité est plus haut et moins stable. Sur un multicoque, le poids est réparti sur près de 90 % de sa longueur.
La deuxième étape consiste à ranger tout ce que vous avez à bord de manière égale autour du bateau. Veillez à ne pas faire gîter le bateau ni à bâbord ni à tribord. Essayez de maintenir le poids au milieu du bateau et, idéalement, le plus vers le bas que possible. Évitez de trop charger les pointes avants avant ou les zones arrière.
En navigation, n’oubliez pas que le pire endroit pour le poids est dans la mâture. Sans quille, vous diminuez considérablement la stabilité du bateau en ayant un Code 0 hissé sur son enrouleur (par exemple). C’est inconvénient de le descendre chaque fois, mais cela en vaut la peine.
Sécurité
Des vitesses plus élevées, des charges plus importantes, un bateau plus léger et un centre de gravité plus haut ne semblent pas être les caractéristiques les plus sûres, et elles ne le sont pas si elles sont mal gérées. Mais vous pouvez les utiliser à votre avantage. Le fait de pouvoir naviguer plus vite signifie que vous avez la possibilité de fuir le mauvais temps.
Il existe également d’autres façons de se mettre en sécurité qui valent la peine d’être considérées. Quel est votre plan pour récupérer un homme à la mer (MOB) ? Avec le franc-bord élevé des catas, certains propriétaires prévoient de faire marche arrière jusqu’à la victime et de la récupérer par la jupe arrière. Mais combien d’entre eux l’ont pratiqué ? Cela implique-t-il d’affaler la grand-voile ? Les hélices, peuvent-elles blesser la victime ? Comment l’arrière du bateau se comporte-t-il dans une mer formée ? Je vous recommande de vous entraîner jusqu’à ce que vous ayez un plan qui fonctionne sur votre bateau avec l’équipement dont vous disposez. Il en va de même pour les plans d’évacuation du bateau ou en cas d’incendie à bord.

Continuez à naviguer
Les bateaux de grande croisière sont conçus pour naviguer à la voile
Posséder un nouveau bateau, c’est comme posséder une nouvelle paire de chaussures…
Faut-il aller dans le Pacifique ?
« Partir pour le Pacifique, ou ne pas partir pour le Pacifique ? » C’est un sujet très débattu en ce moment. Et un sujet avec lequel les gens ont vraiment du mal à se confronter.
Personnalisez avec prudence
Dans le monde occidental, nous aspirons à avoir le choix. La liberté de choisir est considérée comme liée à la fortune et à la réussite. Plus vous avez de pouvoir, d’argent et de sécurité, plus vous avez de choix à votre disposition.